What are pages?
The Whispli landing page is the first point of entry for Informants when they are considering submitting an anonymous disclosure to your organization. Hence, it is important to set it up correctly to empower your employees to make a disclosure.
Pages also allow you to integrate a channel so employees can submit anonymous reports to you.
Based on the plan you are on, you can create multiple pages specific to your business needs. Some companies focus on just one page communicating their whistleblower program, while others might create multiple pages depending on their needs. These needs could include needing pages in different languages, having pages for different business units, or creating pages for different audiences if they have expanded their anonymous reporting to partners or even customers.
Pages provide you with a very easy, flexible way to communicate your whistleblower program and are the first stop when an employee decides to provide an anonymous report.
How to update or configure your landing page?
Create a landing page
Please see the instructions below on how to create or edit your own landing page. The following changes can only be made by admins and configurators on the system.
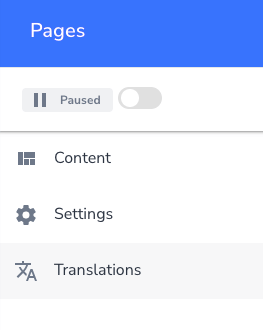
To access the landing page, log in to Whispli and click on Pages on the main menu.
-png.png)
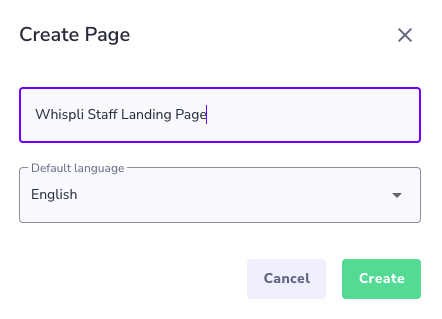
To create a new landing page, click on Add New, type in the name and click Create. If you need the landing page to be in a language other than English then you can select that in the dropdown.
Please note the page name is not visible to Informants.
Content
The updated landing pages are made up of the following customizable components:-png.png)
-png.png)
Due to the new structure of pages, your existing page blocks will automatically be converted to the new components.
- Organisation name or name of your whistleblowing program -> Headline
- Welcome Block content -> Description
- Channel blocks -> Channel links
- Text blocks -> Tabs
This module is where all the content of your landing page will be added. It is split into 4 areas - Header, Tab 1, Tab 2 and Tab 3.
-
Logo
The first step is to upload your logo to the page. Click on Add Logo and select the appropriate file from your device, preferably in a .png format. All logo sizes will be automatically set to a 200px by 100px aspect ratio.
We recommend using a horizontal style logo, with a transparent background. If your existing logo does not match this criteria, you should update it.
*If no logo is uploaded. The live page will show the logo uploaded in “settings > Organisation Overview” by default
-png.png)
-
Headline
The next step is to add a headline to your page, this could be the name of your internal Speak up policy or a short tagline.
By default, this will be your organization name.

-
Description
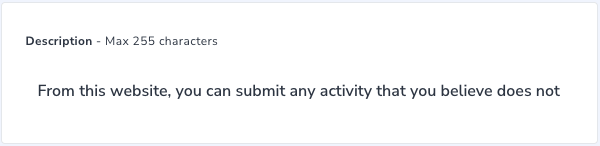
A short description can now be added under the headline however, it is not mandatory to include a description. This should be a short, introductory message explaining the purpose of the platform. Please see the example text below:
"From this website, you can submit any activity that you believe does not meet the organization's values. Your submissions are always anonymous and we will assign your report to a case manager within 48 hours to start an investigation into the matter."
By default, this will be the content from the welcome block of your original page (previous version). If your existing content is very long, we recommend updating this section and moving additional information into a custom tab.
* The description has a maximum character count of 255.
-
Channel links
The final step is to link your channel to the landing page so that when the informant wants to lodge a report, they are taken straight to the linked form.
If you are not able to see your channel in the dropdown menu, you will need to set your channels to Live before you can link them to the landing page.
You are able to add up to 3 channels to the landing page and by clicking on the eye icon on the right, you can set their visibility to the page. The line through the eye icon means that this channel is not visible to the informant.
You can also name the button link. This should be a 1-3 descriptive title. For example “Make a report” or “Report an incident”.
-png.png)
-
Header
An optional step is to add a banner image in the header. It will be automatically set to 1000px by 395px. It will appear above all other content
The image you upload will be cropped to this ratio, and cropping may appear slightly different depending on the viewport. To ensure the image looks good on all devices, use the suggested dimensions, and don’t put any text or important content close to the border.
-png.png)
-
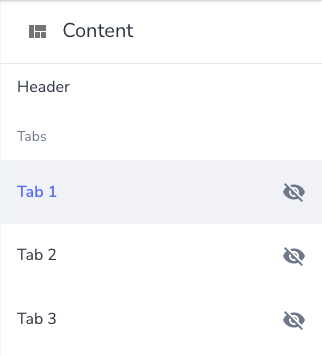
Tabs
This module can add further information/content to your landing page. There are 3 tabs that can be included on your page. You can manage tabs by clicking on the eye icon.
Tabs will need a title and text can be directly typed into the box or be copied/pasted.
You can also add HTML styling and hyperlinks to tab content. We recommend using tabs for important and relevant information, such as your Reporting Policy, Code of Conduct, or an FAQ.

-
Translations
The landing pages can be translated into other languages. To access this setting. Please click on translations on the left side of the page.
Select the relevant language from the dropdown on the right-hand side of the page.

Copy/paste or type in the translation of the English text in the corresponding box.-png.png)
Set the Landing Page Live
Preview
At any time while editing the landing page, you can preview the configuration without having to set the page as Live. Please click on the Preview button on the top right corner of the page.

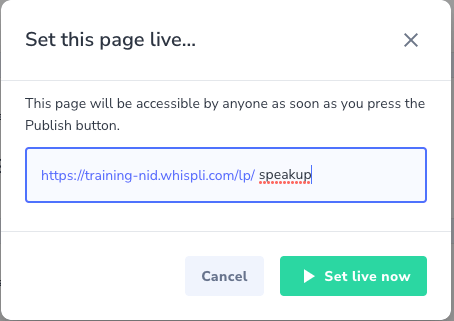
Publish your Landing page
When the configuration of the landing page is complete, the landing page can be set live with a custom URL.
Click on the Set Live button in the top right corner. In the pop-up box, you can customize the URL slug to reflect your change management.
Once the page is Live, you can now download the QR code.

You can also check our tutorial video on how to create or update your landing page here.