What are pages?
Learn more about what pages are here.
Creating a new page from scratch
Please note that this feature can only be used by admins, restricted admins and configurators on the system.
To create a new page, click on Pages on the main menu. Depending on your access rights, you may not see all the items displayed here in the menu:

If 'Pages' is not available in the menu, it means you do not have the access rights to edit or create pages. In this case, reach out to your platform admin.
Once in the Pages configuration, you can create a page by just clicking on the 'Add new' button at the top center of the page :

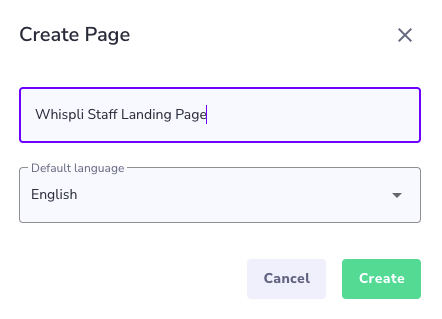
Then just define a name for the page (the page name is not visible to informants and can be changed at any time), select the default language and click Create.
What should be the default language of the page?
Whispli pages automatically adapt to the language set up in your browser. For example, if your page has been created in Spanish and English, and your browser is set in Spanish, the page will automatically be displayed in Spanish. If your browser is set in English, the page will automatically be displayed in English. If the browser language has not been activated, the browser will display the Default language. In this example, if the browser is set in Chinese, the page will be displayed in English, because no Chinese version of the page exists.
We recommend you select a default language that is widely understood by your wide target audience.
Step by Step Page Configuration
Step 1: Add a Logo
The first step is to upload your logo to the page. Click on Add Logo and select the appropriate file from your device, preferably in a .png format.
The recommended dimensions for the logo are 200 x 100 px minimum.
We recommend using a horizontal style logo, with a transparent background.
If no logo is uploaded. The live page will automatically show the logo uploaded in 'Settings' > 'Organisation Overview'.
-png.png?width=670&height=601&name=mceclip5%20(1)-png.png)
Step 2: Add a Headline
The headline is the title of the page in bold at the center. It has a limit of 300 characters. The text is displayed in black and bold characters, no formatting is possible.
Here are some common examples of headlines used by our clients:
- Welcome to the [client name] whistleblowing platform
- Internal Alert Platform
- Welcome to the portal of [Client name]'s ethical whistleblowing system
- Welcome to [Client name]’s SpeakUp platform!
- Welcome to the [Client name] reporting tool
- Report an issue to [Client name]
- WELCOME TO THE [CLIENT NAME] WHISTLEBLOWING HELPLINE
- [Client Name] Safe Reporting Platform
- Speak Up to [Client Name]
- Welcome to the [Client Name] Support Portal
- We thank you for your help in ensuring that the behavior and actions of our business are fully consistent with our values.
Step 3: Add a Short Introduction
The description is the text underneath the headline, designed to provide some context and generic guidelines. It has a limit of 800 characters to ensure that the page looks nice, especially on mobile devices. The text is displayed in gray and is centered. No formatting is possible in this section.
Step 4: Add the information available in the tabs
The first tab displayed by default on the page is the ‘How it works’ tab. This one cannot be modified. In addition to this tab, you can display up to 3 tabs that are entirely customizable. For each one of them, you may define:
- The tab name (as short as possible to fit on the page)
- The tab content (up to 30 000 characters)
Common tabs usually include the following content:
- Speak up policy
- Message from the CEO/Board/Ethics Committee
- Protection of the whistleblower
- Frequently Asked Questions
- Useful links
Please reach out to the Customer Success Team at support@whispli.com if you'd like to get examples and best practices of page setup from other customers.
Step 5: Define the buttons
You can link up to three channels on your page. Each channel is accessible through a green button at the center of the screen. You can define the text available on each button. Please try to have a text as short as possible.
Note: the follow-up button at the top right of the screen cannot be modified or moved to another area of the page.
Step 6: Add a banner image (optional)
The banner image is optional but we recommend you use one to make sure the page is welcoming and looks professional. The banner is displayed at the top of the page, above the logo. The recommended format of the banner image is a landscape orientation with the following dimensions: 1024 x 576 px.
Please note: the banner image will be consistent across all language versions of your page. To ensure accessibility for all users, we recommend avoiding text in the image, or using only universally understood symbols or phrases.
Please reach out to the Customer Success Team at support@whispli.com if you'd like to see examples of banner images used by other customers.
Step 7: Make the page available in other languages
Whispli translates automatically most of the content of the informant's journey on the platform. You only need to provide translations for the content that you yourself created. This includes:
- The headline
- The description
- The tabs (tab name and content)
- The button names
Check this page to understand how to add translations to your page.