Steps in a Workflow allow you to create individual sections of the Workflow that correspond to each stage of your investigation process. This helps you customize Whispli to fit any existing process as well as helping to show a progression in the investigation.
Creating A Step
-
To create a step, go to an individual Workflow and click the "Add A Step" button at the bottom.
-
This will create the step and you can now choose a name for this step of the Workflow.
-
You can now start creating the specific questions you want a case manager to answer for this step of the Workflow.

Re-Ordering Steps
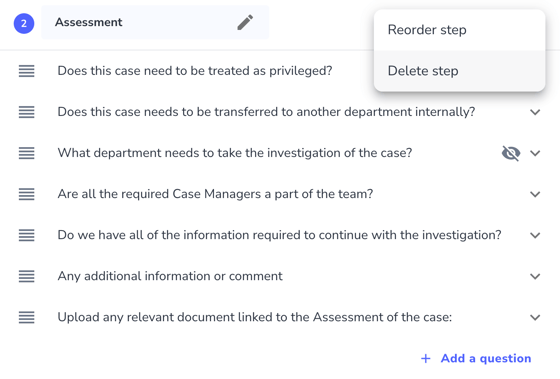
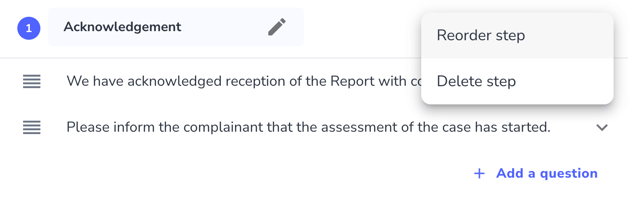
As you start creating steps, you might find you need to move these steps around to create the order you would like them in your Workflow. To reorder your steps, click the 3 dots at the upper right-hand side of each step and choose "Reorder step".
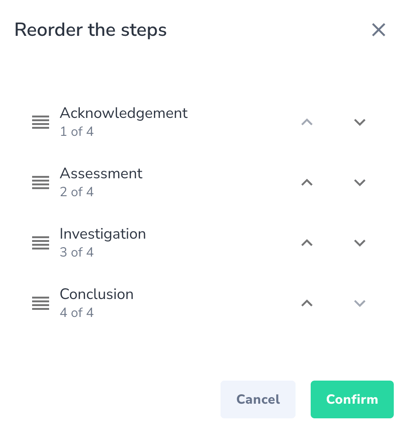
You will next see a screen where you can either drag and drop the steps on the left-hand side or use the arrows on the right-hand side to move steps up and down.
Deleting Steps
To delete a step, click on the 3 dots on the right and side and choose "Delete".