Learn more about each component of the Pages feature and what each one does.
The updated landing pages are made up of the following customisable components:
.png?width=252&height=237&name=mceclip3%20(2).png)
.png?width=545&height=642&name=mceclip4%20(1).png)
Due to the new structure of pages, your existing page blocks will automatically be converted to the new components.
- Organisation name or name of your whistleblowing program -> Headline
- Welcome Block content -> Description
- Channel blocks -> Channel links
- Text blocks -> Tabs
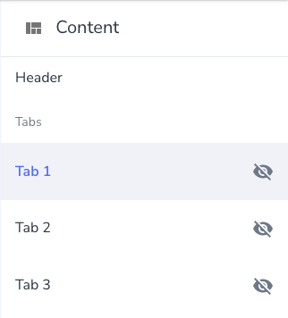
This module is where all the content of your landing page will be added. It is split into 4 areas - Header, Tab 1, Tab 2 and Tab 3.
-
Logo
The first step is to upload your logo to the page. Click on Add Logo and select the appropriate file from your device, preferably in a .png format. All logo sizes will be automatically be set to a 200px by 100px aspect ratio.
We recommend using a horizontal style logo, with a transparent background. If your existing logo does not match this criteria, you should update it.
*If no logo is uploaded. The live page will show the logo uploaded in “settings > Organisation Overview” by default
.png?width=414&height=371&name=mceclip5%20(1).png)
-
Headline
The next step is to add a headline to your page, this could be the name of your internal Speak up policy or a short tagline.
By default, this will be your organisation name.

-
Description
"From this website, you can submit any activity that you believe does not meet the organization's values. Your submissions are always anonymous and we will assign your report to a case manager within 48 hours to start an investigation into the matter."

By default, this will be the content from the welcome block of your original page (previous version). If your existing content is very long, we recommend updating this section and moving additional information into a custom tab.
* The description has a maximum character count of 800.
-
Channel links
The final step is to link your channel to the landing page so when the informant wants to lodge a report, they are taken straight to the linked form.
If you are not able to see your channel in the dropdown menu, you will need to set your channels to Live before you can link them to the landing page.
You are able to add up to 3 channels to the landing page and by clicking on the eye icon on the right, you can set their visibility to the page. The line through the eye icon means that this channel is not visible to the informant.
You can also name the button link. This should be a 1-3 descriptive title. For example “Make a report” or “Report an incident”.
.png?width=487&height=344&name=mceclip6%20(1).png)
-
Header
An optional step is to add a banner image in the header. It will be automatically set to 1000px by 395px. It will appear above of all other content
The image you upload will be cropped to this ratio, and cropping may appear slightly different depending on the viewport. To ensure the image looks good on all devices, use the suggested dimensions, and don’t put any text or important content close to the border.
.png?width=456&height=505&name=mceclip7%20(1).png)
-
Tabs
This module can be used to add further information/content to your landing page. There are 3 tabs that can be included on your page. You can manage tabs by clicking on the eye icon.

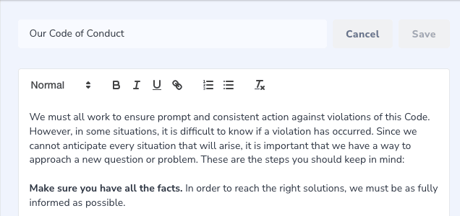
Tabs will need a title and text can be directly typed into the box or be copied/pasted.
You can also add HTML styling and hyperlinks to tab content. We recommend using tabs for important and relevant information, such as your Reporting Policy, Code of Conduct, or an FAQ.

-
Translations
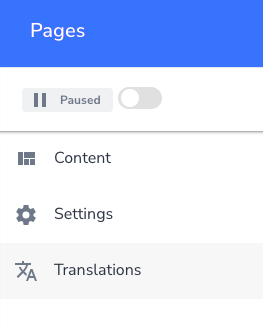
The landing pages can be translated into other languages. To access this setting. Please click on translations on the left side of the page.

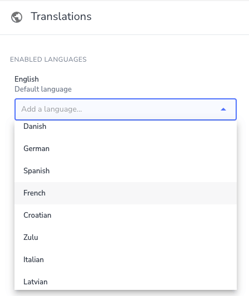
Select the relevant language from the dropdown on the right-hand side of the page.

Copy/paste or type in the translation of the English text in the corresponding box.
.png?width=447&height=333&name=mceclip9%20(1).png)
-
Settings
